The Best Ever Soft and Gooey Cinnamon Buns by “Indian Rock Vegans”
Jan 21, 2019 by erin
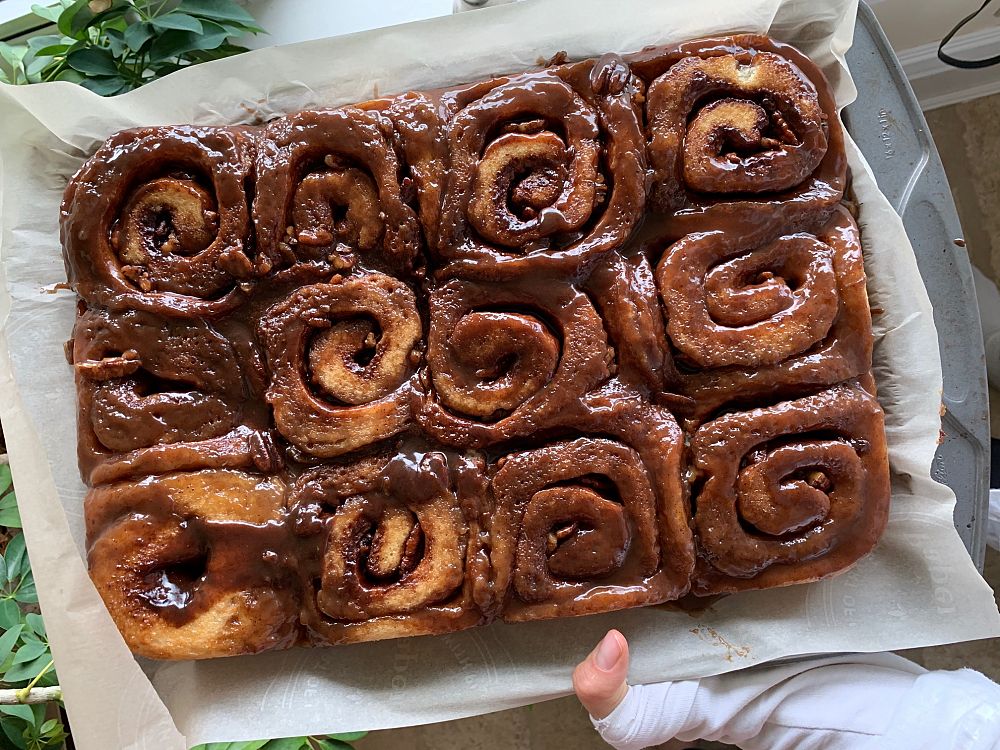
Introducing, the most incredible, soft, gooey cinnamon buns you have ever met!! And, huge bonus, they’re 100% plant-based and cruelty-free!!
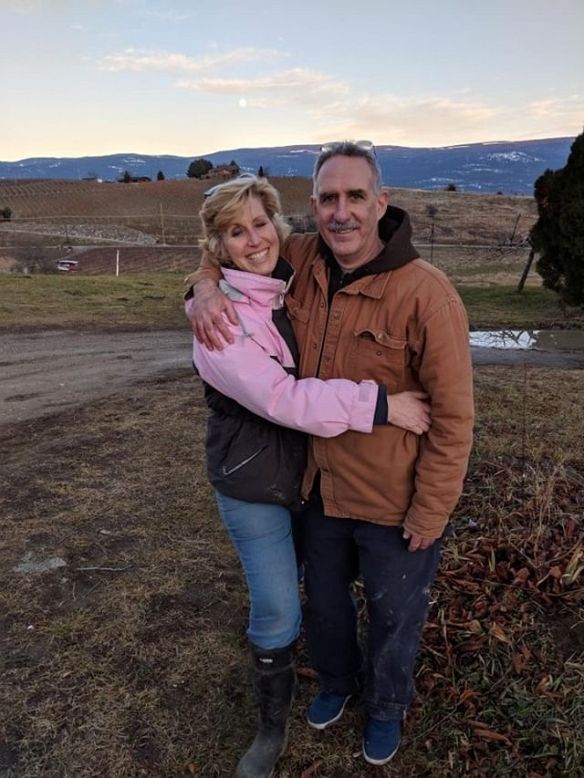
If you follow my Insta-stories, you may have noticed me *dying* over these on the weekend. Three of the To Die For ladies and I took a road trip to the Okanagan to visit a trio of newly rescued dairy calves at Critteraid Farm Sanctuary and we got to spend some quality time with our friends Dan and Sheanne of Indian Rock Vegans who so graciously hosted us for the weekend.
It’s an understatement to say that we were all blown away by the breakfast they served us on Sunday morning, Sheanne’s homemade cinnamon buns being the highlight. We couldn’t get over how soft and almost doughy their texture was. And the pear cream in place of icing was a hit. Cinnamon buns are rich enough — a lighter option like Sheanne’s pear cashew cream was the perfect pairing.
Lucky for all of us, Sheanne has so generously shared her recipe with us!! Huge thanks to has as the recipe had never even been written down before! It was in her head and on scraps of paper and old receipts around the house!! Thank you Sheanne for taking the time!! Also, you must read her ‘vegan story’ here that she shared in the documentary, Eating You Alive. Sheanne lost 133 lbs on a whole food plant-based diet and gained a whole new perspective on life! Her story is amazingly inspiring. Anyways, I promise you will not regret making these. Try them this weekend and please tag us so we can see your creations! @IndianRockVegans @ErinIreland
Ingredients
For the yeast mixture:- 4 tsp active dry yeast
- 1 tsp sugar
- 1 c. very warm water
- 1 c. non-dairy milk
- ⅔ c. white sugar
- ⅔ c. vegan butter
- 2 tsp salt
- 6 c. organic white unbleached flour
- ½ c. vegan butter (room temperature)
- 1 c. white sugar
- 3 tbsp cinnamon
- 2 tbsp cocoa powder
- 1 c. toasted chopped pecans (optional)
- 1 c coconut cream (the solid white stuff in one to two can’s worth of coconut cream or milk, depending on the brand used)
- ⅔ c. brown sugar
- 2 tsp cinnamon
- 2 x 28 fl oz. cans of pear halves in juice
- 1 c. soaked raw cashews
- 1 tsp vanilla
- Pinch of salt
DIRECTIONS
For the dough:
- Warm the oven by turning on the oven light. This will be the perfect temperature for the dough to rise.
- In a medium bowl, mix the yeast, sugar and warm water together and set aside.
- In a saucepan, combine the non-dairy milk, sugar, vegan butter and salt over medium-low heat until butter is melted. Set aside and let it cool until it’s no longer hot to the touch.
- Once cool, add the yeast mixture (which should be foamy). Note: if the milk mixture is too hot, it will kill the yeast!
- In a separate large bowl, add 3 cups of flour. Add the warm milk/yeast mixture and mix gently with a spoon. Add the remaining 3 cups of flour and continue to mix gently. Transfer flour mixture to a lightly floured surface and knead for 8 minutes (which will feel like forever) until it resembles dough. Place in a lightly oiled bowl and cover with a slightly damp towel. Place the bowl into the mildly warm oven for 90 minutes.
For the filling:
- While waiting for the dough to rise, mix together the vegan butter, sugar, cinnamon and cocoa in a bowl. Set aside.
For the pan sauce:
- In a bowl, whisk together the coconut milk, brown sugar and cinnamon. Lightly grease a large baking dish (16” x 11”) or two smaller baking dishes and add the pan sauce. Set aside.
For the pear cream (which you can make ahead as it’s best serve chilled):
- Place 1 cup of pear juice and 1 cup of soaked cashews in a high-powered blender. Blend until completely smooth. Add the rest of the pears, vanilla and salt. Blend until smooth, transfer to a small bowl and place in fridge.
Back to the dough!
- Once the dough has risen for 90 minutes, use a rolling pin to create a rectangle, about 20” x 15”. Use your hands to shape the edges. Next, add the filling mixture to the dough and, using a spatula or knife, spread it evenly. Sprinkle on toasted pecans, if you like.
- Begin rolling the dough from the short side of the rectangle. Use your hands to keep the edges symmetrical by rolling the entire roll back and forth till it feels cylindrical.
- With the seam down, use dental floss (yup) to “cut” the individual cinnamon buns by placing the floss under the roll and drawing it upwards and crossing it to cut the roll. This makes a nice clean cut without “squishing” the roll with a knife. Repeating the cutting step until you have 12 to 14 rolls, each appromixately 1” to 1 ¼” wide.
- Gently place each roll on top of the pan sauce. There should be a bit of room between the rolls so they can rise again.
There are two options at this point (a quick one and a longer one) →
Quick option:
- Cover with plastic wrap, return them back to the warming oven for 45 minutes to rise and then bake immediately at 350F until golden brown and bubbly (around 25 minutes).
Longer option (Sheanne’s favourite):
- Cover with plastic wrap and place the buns in the fridge overnight to rise slowly. In the morning, remove from the fridge and let sit at room temperature for 30 minutes then bake at 350F until bubbly and golden (around 24 minutes). This method allows freshly baked cinnamon buns for breakfast without having to get up at the crack of dawn.
Remove from oven, loosen the sides with a knife and then place your serving platter (or rimmed baking sheet lined with parchment) over the pan, then carefully and quickly flip the cinnamon buns over onto the platter. Serve warm with pear cream.
